
Do you ever wonder how coffee beans get roasted? Would you like to gain more satisfaction from your morning coffee? Learning about the coffee roasting process will enable you to roast and brew the desired coffee of your choice. Coffee with the exact degree of sweetness or bitterness of your choice. This article on how to roast coffee beans at home is for all coffee drinkers, especially new coffee connoisseurs that just joined the club. But before we dive deeper, let’s first remind ourselves of some basic things about coffee.

Coffee is a green fruit that grows on the Coffea tree. It is cultivated and harvested on a plantation and passed through a series of processes before it’s packaged and sold out to the public. These processes include pulping, fermentation, drying, hulling, grading, and finally, roasting. These steps are essential, but the roasting quality dramatically impacts the taste of the coffee. It has more to say about the flavor of your brews.

And for this reason, some dedicated coffee drinkers love to buy processed coffee beans and roast them themselves. There are testimonies of beginners who tried it with one trial’s intention and now prefer to roast their coffee by themselves. So, as you see, coffee roasting isn’t just for the serious coffee connoisseurs, it can be done by anyone. So if you’re ready to roast some delicious coffee, stick around and carry on with our coffee roasting guide. Now, let’s get to it.
What happens during coffee roasting?
Coffee roasting is a process that takes a few minutes, but within this short period of time, the beans undergo lots of physical and chemical changes. The stage at which these changes are stopped will determine the resulting flavor of the coffee bean. Therefore, it’s imperative that all coffee roasters, especially those looking forward to roasting coffee beans at home, understand the reactions that occur when coffee beans are exposed to high temperatures.

The first noticeable transformation is browning, the change in the coffee beans’ colour from Green to Brown. This conversion happens due to a process known as the Maillard reaction. Maillard reaction occurs when you heat your coffee beans to 150⁰C/302⁰F in which the beans release a chemical known as melanoidin that is responsible for the colour transformation. In some cases, there may be a slight yellow colour before it finally crosses to Brown. It’s believed that a shorter Maillard reaction will result in tasty coffee.
The bean’s appearance is not the only thing that changes. Its mass and volume are also affected. Coffee beans always experience a decrease in mass whenever they are roasted. According to experts, about 12-20% of bean weight is lost after roasting, the water in the coffee bean is converted into gas increasing the bean’s volume. The volume increment occurs due to pressurized gas within its walls. This massive internal pressure also forces out the oils from the centre of the cells into the beans’ surfaces.

There are just as many invisible reactions as there are physical changes, and all these transformations work towards improving the coffee flavour, as long as the coffee isn’t overdone and burnt. The most significant chemical reaction is Cameralization, and it is the process that converts organic sugar into caramels, also known as sticky brown sugar. Another response is called the Strecker degradation, and it’s in charge of the sweet aroma of your coffee.
Stages of Coffee Roasting

The question of “how to roast coffee beans at home” will also require us to examine coffee roasting stages. There are different approaches to this aspect, but all say the same thing. In our case, we would like to keep it simple and straightforward. The following are the five stages of Coffee roasting.
Drying (Raw Green Beans)

This stage can be divided into green, yellow, and steam stages. The reason being that it’s the stage in which the coffee experiences colour changes and evaporation. The drying stage is when the coffee beans are exposed to hot temperatures and begin the roasting process. As the beans get warmer, the colour changes from green to yellow and heads toward the final brown colour. Also, the water in the beans is converted into gases.
Roast in this stage: No roast at this stage.
Browning
As the coffee beans are kept on the fire and continuously stirred to prevent burning they undergo constant heat circulation, as they quickly reach the browning stage. Aside from colour transformation, this is the stage in which the coffee’s internal core becomes pressurized by gas. The beans start making a cracking sound as they start to reach their full capacity, signifying the cracking stage.
Roast in this stage: No roast at this stage.
First crack (Light Roast)

This is the part where the chemical changes begin to occur. The sugars start to caramelize as the cracking sound persists. This cracking sound is similar to that of popcorn. Some people may choose to stop roasting at this stage if they love bitter coffee. However, those who don’t will keep roasting to move from the light roast to the medium roast.
Roast in this stage: Light City, Half City, Cinnamon Roast
Roast development (Medium Roast)

The development stage entails the city roast and the city plus roast. In the development stage, the sugar continues to caramelize so that the coffee reaches the peak of its sweetest flavour in the city plus roast. It also darkens in colour and starts to crack again at the end of the development stages.
Roast in this stage: City Roast and City Plus Roast
Second crack (Medium Dark – Dark Roast)

Coffee beans are said to have reached the full city roast the moment they give out the second crack. The second crack serves as a warning to prevent your coffee beans from getting burnt. It gives a violent sound for roasters to quickly put out the heat source. However, the beans still maintain a delicious taste at the full city roast stages. The coffee bean will begin to obtain oil on its surface during this stage.
Roast in this stage: Full City Roast, Full City Plus Roast
Darkening (Dark Roast)

After this stage, there is a dark roast that leads to the burning of the beans. The darker roasts are also known as French roasts, and they mark the period where the beans start to give a pungent smell due to the excessive burning of the sugar, but the taste is not yet affected. The beans surface begins to shine as it’s oily surface becomes evident. Continuing to roast past this stage will result in burnt coffee beans, the aroma and the flavor will be undesirable.
Roast in this stage: French Roast, Espresso Roast, Italian Roast
Post-Roast
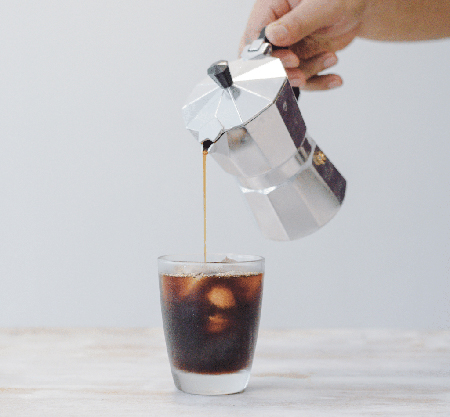
Roasting the coffee beans does not complete the whole process. You still have to cool off, degas, and store them. Immediately after roasting, the next thing is to transfer the roasted coffee beans into a metallic colander (the plastic ones will melt when making contact with the roast). You can leave the hot coffee beans to cool off for a while, or you can quicken the cooling process by continually transferring them between two colanders.
The transferring of the coffee beans between two colanders will also help remove the beans’ husks. After roasting, there will be some messy husks on the beans that need to be removed. However, you don’t need to remove all, just try your best to remove as many as possible. The next stages of home coffee roasting are Degassing and Storage.

There are over 800 chemical reactions that occur during coffee roasting of which carbon dioxide gas is one of the results, and it’s in charge of the coffee crema and refreshing taste of the coffee. However, this substance must be available in the right quantity; less of it will stale the coffee and too much of it will make your coffee bubble and taste sour. Therefore, there’s a need for degassing before storage.
Storage, on the other hand, is also done specially. The coffee beans must be stored in an air-tight environment that’s not exposed to sunlight. This is to keep enough CO2 in the storage container and prevent the oxidation of the beans. Therefore, you must ensure quality storage to keep your beans fresh for an extended period. Before we move on to the degassing and storage part of this article, let’s take a look at the various ways on how to roast your coffee beans at home.
Getting Started (What you need to consider before roasting)
Now, let’s proceed by looking at the things you need to consider before roasting your coffee. These are the compulsory stuff that must be in place before you start roasting your coffee beans at home. They are;
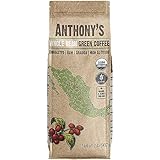
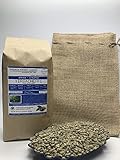
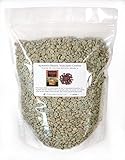
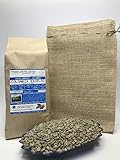
Green Coffee Beans
There is no roasting without green coffee beans. So acquiring a supply of green coffee beans before is a must before you can move forward with your home roasting experience. The challenging part of this is that the green beans are not readily available like the roasted ones. Most retailers like dealing with roasted beans. The best option is to consider making a deal with a wholesaler.

Another way out is to purchase your green beans online. There are green coffee dealers on the internet that will deliver them to your doorstep. One of them is Sweet Marias, a company that deals in raw coffee produced in Ethiopia, Kenya, Costa Rica, etc. They also sell in smaller quantities and at affordable prices.


Roaster
Let’s move on to the main equipment required for coffee roasting. Getting a home coffee roaster is the best choice that will provide a stress-free roasting experience.

However, we can also make use of readily available home equipment if we are on a budget. These alternatives include the use of a pan, oven, Popcorn popper, and a stovetop popcorn maker. If you have any of these in your kitchen, you are good to go. Just stay with us as we will teach you how to use them in the next section of the article.


Storage
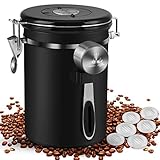
Unless you are roasting small batches for single consumption, you will need to look into a storage method that will keep your coffee beans fresh and tasty for weeks on end. So how do you keep your coffee beans tasting fresh? By keeping them in an air-tight environment that prevents the inflow of oxygen and allows the venting of CO2. A one-way valve container is perfect, and you can also purchase those coffee vaults, coffee canister, and-tight food dispensers that are available on Amazon.


![Glass Coffee Bean Container, 52.36 FL OZ (1550 ML), [Thickened Version] 77L Glass Food Storage Jar with Airtight Seal Bamboo Lid - Clear Food Storage Canister for Serving Tea, Coffee, Spice and More](https://m.media-amazon.com/images/I/41DgeHVz7IS._SL160_.jpg)


Home Roasting Methods
The moment you have been waiting for has finally come. It’s now time to use what you have at hand to roast your green coffee beans. Just make yourself comfortable; this guide will provide you with all the details to roast coffee beans at home, including the necessary materials for every method.
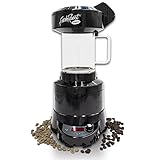
Roast Coffee Beans at Home with a Home Coffee Roaster
Let’s go from the easiest to the challenging ones. Unlike in ancient times, we now have machines that are built explicitly for roasting green coffee beans at home. They work similarly to the popcorn machine, blowing hot air over coffee beans at an incredible speed. The home coffee roasters come in various sizes and are priced fairly since there are many manufacturers. It’s definitely a great investment if you’re looking into getting into home coffee roasting because the machines handle the stressful parts of the work.
Materials needed:
- A home coffee roaster
- Unroasted coffee beans
- Two colanders
- A pair of oven mitts
Roasting process:
The first step to roasting your beans is to fill your machine with a precise quantity of beans. You can get to know the exact measurement by consulting the user manual.
The next thing is to switch on the machine and follow through the roasting stages, from light roast to medium, and finally to dark roast. All of these should take a few minutes, and you should quickly turn it off the moment it reaches your desired roast colour.
As coffee roasting is concerned, the difference between a good and a lousy roast is just a matter of some minutes. Therefore, you must be wary of the stages to get it right.
The two colanders are for cooling the roasted coffee and removing the husk. Make sure to use a pair of oven mitts when handling the colanders to prevent any chances of getting burnt.
Make sure to degas the beans for approximately 12 hours after the roast.
The Pros and Cons of Roasting Coffee Beans with a Home Coffee Roaster:
Roast Coffee Beans at Home with a Popcorn Maker
The popcorn popper is another machine to reduce the heavy lifting work of roasting coffee beans. It’s also a better way to experience the coffee roasting stages and observe the physical reactions. The working principle of the popper is similar to that of the roaster, the blowing of fast-moving air over the coffee beans. The only con of using this method is that it may reduce the lifespan of the popcorn popper.
Please keep in mind: When using a popcorn maker to roast coffee, you will be voiding your warranty. Roasting coffee will take a toll on your machine and may break down your popper after a few months of usage. Make sure your popper dispenses heat throughout the chamber and not just from the bottom for this will give you an uneven roast and may cause a fire. Never leave the popcorn maker unattended during a roast.
Materials need:
- A popcorn maker machine
- Unroasted coffee beans
- Two colanders
- Heatproof spoon (wooden)
- A cup
- A pair of oven mitts
Roasting process:
You begin the roasting by first heating this machine for 30 seconds. Make sure you are using the popper in a well-ventilated area.
After this, put ½ cup of coffee beans into the popper. Make sure that the beans can move freely. Use the wooden spoon to agitate the beans so that they can begin to move.
Then, you let the heating continue for 3 minutes and watch the beans transit from one stage to the other. Listen and watch carefully, for a light roast you should hear your “first crack” at about 3 to 5 minutes. At about 6 to 8 minutes you should encounter the “second crack” which will be your medium roast. A minute or two after, you will be at the Medium Dark – Dark roast territory.
Be on the alert to turn off the machine as soon as it reaches your desired roast.
The next thing is to transfer the roasted beans between the two metallic colanders to cool and de husk them simultaneously, don’t forget to putt on your mitts!
Let the roasted coffee beans degas for approximately 12 hours and store them properly.
Pros and Cons of Roasting Coffee Beans with a Popcorn Machine


Roast Coffee Beans at Home with a Stovetop Popcorn Maker
Using a stovetop popcorn method is one of the traditional ways of roasting coffee beans at home. A stovetop popcorn maker is a pot-like machine with a crank in the top that is connected to a blade that stirs the corns. The machine is heated by being placed on a stovetop or into an oven. This method’s cons are that your beans can easily get burnt, and things will certainly be smoky. You should perform this method outside your house, in the open-roof for ventilation.
Materials needed:
- A stovetop popcorn maker- The Whirley is the best.
- Unroasted coffee beans
- A laser thermometer (optional)
- Two metallic colanders
- A stove or hot plate.
- A pair of oven mitts
Roasting process:
When the table is set, and you have arranged the right spot outdoors. The first step is to preheat your stovetop to a temperature reading of 500 degrees on the laser thermometer. But if there is no thermometer, just heat the popper for 5 minutes.
Next, add your coffee beans, ½ cup as usual. Now is the time for cranking, and this is done to circulate the heat faster.
The last roasting step is to watch the transition of stages from the light to dark roast and stop at the point that gives you your desired roast. Also, note that the procedure can also be performed indoors, but the room must be highly ventilated.
Don’t forget to use the two colanders and oven mitts to remove the chaffs.
Pros and Cons of Roasting Coffee Beans with a Stovetop Popcorn Maker


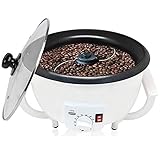
Roast Coffee Beans at Home with an Oven
The oven is another machine that can be used for roasting coffee beans. Be prepared to deal with smoke if you are considering this method. Besides, the hot air blasting ovens are not suitable for this kind of experiment because they will drastically increase the temperature of the room and get things messy.
Materials needed:
- An oven
- Unroasted coffee beans
- A laser thermometer (optional)
- Perforated baking trays or normal baking trays with a baking sheet
- Two metallic colanders
- A pair of oven mitts
Roasting process:
The first thing is to heat the oven to a temperature of 500⁰F, and then place the coffee beans on the tray. You then place the tray on the oven’s middle rack section, giving it a consistent heat.
The tray is to be given a shake frequently to get all the coffee beans evenly heated. This should go on for about 5 minutes till the first crack is heard, a minute later and the second crack will follow.
Keep an eye on the tray and pull it out when you reach your desired roast colour. The cooling and chaffering process remains the same.
Pros and Cons of Roasting Coffee Beans with an Oven
Roast Coffee Beans at Home with a Pan
Almost every house has a free pan lying around, and therefore, this method is common among home coffee roasters. However, it’s the most difficult to use because it’s extremely easy for the coffee beans to get overcooked and smoky.
Strictly avoid using pans that are coated or have a non-stick surface, for this will negatively impact the flavour of your coffee roast.
Material needed:
- A thick pan
- A stove or a portable hot plate
- A laser thermometer (optional)
- Two metallic colander
- A stick or wooden spatula
- A pair of oven mitts
Roasting process:
If you have a portable hot plate and have the option of roasting in your backyard then we highly recommend it. If not, you can still do it indoors provided that there is ventilation in the room.
Begin the process by preheating the pan to a temperature of 450⁰F; the thermometer will be handy here. Then, place the coffee beans onto the pan.
The amount of the beans will depend on the surface area and depth of the pan. Just ensure that heat can easily circulate throughout the beans, and you can stir the beans well.
The next step is to keep agitating the beans with the spatula so that they roast evenly. In 4-5 minutes, the beans will give the first crack and reach the dark roast a minute after.
So listen carefully and keep a close eye on them. Once you reached your desired roast, cool them off with the two metallic colanders. Make sure you are wearing your oven mitts.
Pros and Cons of Roasting Coffee Beans with a Pan
How to Avoid Common Home Roasting Errors
The following are the typical home roasting errors and how to avoid them.
Inconsistent temperature
The inconsistent temperature will result in a combination of burnt and unroasted coffee beans. It would help if you used a stove or a roasting method that you can easily set the temperature. The temperature for roasting coffee beans should be around 350⁰F and 450⁰F.
Roasting too many beans at once
Roasting too many beans in a batch can be likened to biting more than the mouth can chew. Only roast a quantity that will allow the circulation of hot air in the roasting equipment, be it oven, pan, or popcorn popper. There must be space between the beans.
Not focusing
When you are in the procedure, be ready to follow from step to step to the end. You must keep an eye on the transition of your coffee beans from stage to stage so they do not get burnt. You should be focused and time conscious after the first crack because a minute delay can result in ruined beans
Degassing/Storage
Degassing is the process of reducing the amount of CO2 present in the beans after roasting. You degas your beans by leaving them in an open space for 12 hours. After this duration, you store them in an air-tight container. Don’t brew the coffee beans until after 24-48 hours of roasting.

To learn more about the degassing process, be sure to check out our Degassing Roasted Coffee Beans Guide
It’s important that after properly degassing your beans for 12 hours, that you store them properly. Using an airtight container is key, especially one with a one-way valve. This will allow for the CO2 to slowly escape and prevent the beans from oxidation. Beans that are stored should be used within 7 days. After a week, the beans will begin to stale as oxidations will set in.
Conclusion
Practice makes perfection, says the English proverb. You will never get it right until you give it a try. Moreover, the journey of a thousand steps begins with one step. And always remember to record the satisfaction obtained from each roast. It’s only through this can you discover and stick to the procedure and cooking condition that tastes well with you. So I hope you’ve enjoyed our guide on How to Roast Coffee Beans at Home and Good luck to you!
IF YOU’VE ENJOYED THIS ARTICLE, GIVE IT A PIN!


2 comments